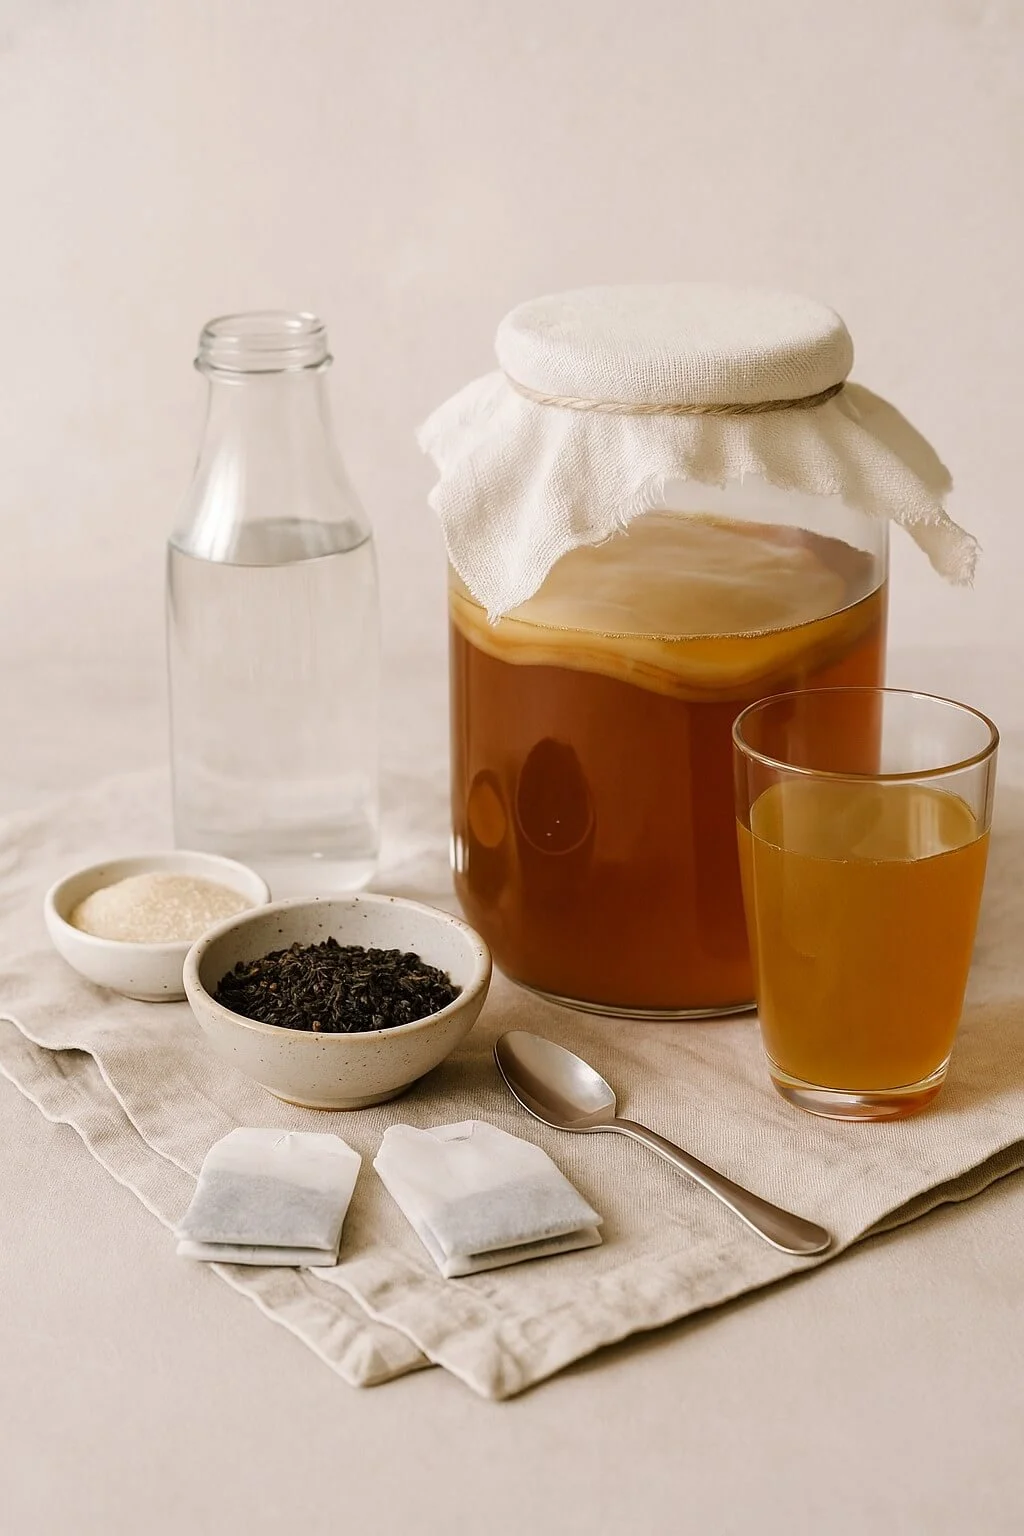
How is Kombucha Made & How to Make it at Home!
Originating from China, kombucha has been around for thousands of years. Nowadays, many people homebrew kombucha and it is gaining increasing popularity in bars and restaurants as a healthy alternative to beer, cider or wine. Some tea bars even have homebrewed kombucha on tap.
Kombucha is made by carefully fermenting tea in a precise and safe manner. This special fermented tea is made up of living bacteria, these live cultures feed off sugared tea to create wondrous kombucha tea.
How to Brew Kombucha Tea at Home
Making kombucha at home is surprisingly easy to do if you pay special care and attention to giving your fermented brew the right conditions that it needs to thrive. It’s pretty easy once you get into the swing of things. Read on to find out how to make your very own kombucha tea at home, including the vital ingredients with correct measurements, the ideal equipment required and the fermenting stages that you will go through before getting to taste test your own booch.
Good for You Probiotics
Kombucha is packed full of probiotics that support the digestive system. Studies show that the bacteria in kombucha are similar to the healthy bacteria found in the gut. There is a direct link between our digestive system and our immune system. Also, studies show that inflammation in our bodies can cause depression. The anti-inflammatory probiotics found in kombucha can help boost our mental health as well as support our digestive health.
What Exactly is a SCOBY?
First things first when making kombucha, you have to make the culture called a SCOBY. This biofilm is also known as the ‘mother’ and sometimes referred to as the ‘mushroom’. SCOBY stands for ‘symbiotic culture of bacteria and yeast’ It is made up of living bacteria which includes Saccharomyces cerevisiae and Gluconacetobacter xylinus. These live cultures feed off the sugary tea and ferment to create kombucha.
To home brew kombucha you will either need to buy a SCOBY or make a starter SCOBY from scratch. There are also lots of online kits available, they will come with a starter SCOBY and enough liquid containing the cultures to brew your kombucha. Or if you have a kombucha brewing friend, they could gift you some cultures with some of their pellicle (the thick mat that sort of floats on top!).
Once you have a SCOBY established, it is time to move on to brewing kombucha for fizzing, flavouring and for drinking! Hoorah!
Unfortunately, sometimes bacteria, mould or bugs can invade your hard work so it’s always a good idea to make a SCOBY hotel as a back-up plan. In the unlucky event of contamination, you have a second, third or even fourth SCOBY waiting in the wings to be used.
Is Kombucha Always Made with Tea?
The short answer to this is yes but the long answer is, no. Confusing I know and here’s why it’s not that simple… Most kombuchas are made from black tea as the caffeine, which is a purine alkaloid, helps feed the live cultures. Black tea generally contains higher amounts of purines than that of other types of tea. These purines help create the perfect acidic environment for the safe making of kombucha. Some shop bought kombuchas will be labelled ‘caffeine free’ and these should always be taking with caution as sometimes they are chemically produced rather than traditionally brewed. There are also ways to make kombucha using coffee, hibiscus and rooibos too. There are a number of ways to do this in the first or second fermentation and it is more complex attempting to safely make herbal kombucha.
Read more about this and other questions: The Ultimate Kombucha Q&A
Is Kombucha Alcoholic?
Kombucha is fermented which means that alcohol is present due to the process, but the alcohol content is less than 1% and is lower than that of non alcoholic beer. Did you know that kombucha makes a wonderful mixer in cocktails? The astringency of kombucha fashions the most delicious cocktails and mocktails too.
How to Make Tasty Kombucha Cocktails!
Kombucha tea is a great ingredient to use in tasty cocktails and it’s super duper easy to do. Here are my favourite kombucha cocktails to make at home:
Ingredients for Making Kombucha
To make your first batch of kombucha, you will need:
Unflavoured black tea: I prefer to use loose leaf tea as it usually has a more delicate taste, however, tea bags will work too. Use a ratio of one tea bag to one teaspoon of loose leaf tea.
White cane sugar: The sugar will feed the live cultures in the liquid and turn into glorious kombucha.
1 cup of kombucha liquid from your last batch: Reserve one cup (8fl oz) of starter liquid from your last batch, and at least half of the pellicle mat from the last batch. I always peel the bottom layers off and keep the newer top layers. Some kombucha peeps will insist that you don’t actually need a pellicle mat for continuous brewing, however, I like to throw it in for good measure. The SCOBY isn’t actually the large mat but the cultures within the liquid itself, the mat is a by product of the chemical processes that take place.
What Equipment do I Need to Make Kombucha?
To start homebrewing your very own booch, you will need the following equipment:
A large saucepan and;
A large glass jar with a non metallic lid or a large glass jar with a spigot. If your glass jar doesn’t have a lid, use a clean tea towel or paper towel and elastic bands. The aim is to keep bugs away, and flies really love kombucha! I would avoid using cheesecloth as the little flies really like to get in. Only use glass or ceramic to store your brewing kombucha. Metal can negatively react with the kombucha and plastic can harbour all sorts of horrid bacteria.
What Tea Should you use for Kombucha?
If your batch of kombucha is new and unestablished, I would recommend only using black tea. After your culture liquid has become established, you can start to experiment with adding a combination of black/oolong/green and white tea. Keeping in mind that the SCOBY prefers the purines in black tea and therefore black tea should make up a minimum of 40% of the total of the tea added. Also, keep in mind that herbal teas and flavourings should be avoided at this kombucha making stage.
What are the Steps to Making Kombucha?
Here are the steps for making kombucha:
First you will need to establish a SCOBY
Once you have an established SCOBY and your starter liquid is ready, you can move on to the F1 stage (first fermentation) as described in more detail below ⬇ This first stage takes around 5-14 days depending on the climate and conditions.
The hotter the climate, the faster the brew.
You can taste test your kombucha every day for a few days until it has reached a optimal taste balance between tartness and sweetness.
For a more scientific approach, you can also test the pH level of your brewed kombucha. When the pH level is between 3.5 and 2.8 it is technically at the perfect fermented point. However, the best part about homebrewed Kombucha is that you are free to brew to your own tastes.
After this stage comes the best bit, the bottling, flavouring and fizzing stage known as F2 (second fermentation stage). Here are some fabulous kombucha flavors to try out.
To bottle the kombucha and add flavour and fizz (this step is purely optional) I take a 16fl oz (2 cup) glass bottles with screw top plastic lids (always non-metal as metal may react with the kombucha).
I like to recycle GTs glass bottles. They are perfect for this use. Add your desired ingredients into the sterilized glass bottles and pour over the kombucha.
Leave about a 1 inch gap at the top of the bottle and screw the lids on really tightly.
Bubbles will start to appear over the next 3-7 days for 2 reasons; 1. Adding something sweet to the kombucha will help create some fizz and 2. by creating an airtight seal, pressure will build up creating some fabulous fizziness.
Leave the kombucha bottles on the counter top in a warm area for 3-7 days and then place in the fridge to slow any further fermentation down.
Warning: Best to be on the safe side and store those bottles in the fridge once optimal bubbly-ness has been reached. Too much pressure inside the bottles can result in the bottles exploding. Here is a little mess free tip: always open a bottle of fizzy kombucha over the sink or outside, the amount of fizziness in each bottle can be quite unpredictable!
Step by Step Instructions: How Kombucha Tea is Made at Home
INGREDIENTS
7 Cups (56fl oz) of Water
1/2 Cup (100g) of White Cane Sugar
4 Heaped Teaspoons of Loose Leaf Black Tea (or 4 Tea Bags)
1 Cup (8fl oz) of Starter Kombucha Liquid with your starter SCOBY
METHOD
Firstly sterilise all of your equipment so that everything is squeaky clean.
Bring the water to a boil in your large saucepan and allow the water to heat on a rolling boil for a few minutes.
Next, add the sugar and keep stirring until it has fully dissolved.
Remove from the heat and add the loose leaf tea/ tea bags.
Allow the water to cool to room temperature. This will take around 6 hours or if you are pushed for time, create an ice bath for your saucepan and allow to cool for just a few minutes until it reaches room temperature.
Once cooled to room temperature you will need to prepare your started liquid and SCOBY. With super clean hands, remove your SCOBY from the glass jar and place on a super clean plate. Next drain the liquid and keep back 1 cup (8fl oz) of the cultured liquid.
Take a look at your SCOBY, they aren’t particularly pretty looking but they are wonderful! If your SCOBY is thicker than 1/2 inch, I would recommend removing the lower layers. You can discard your SCOBY layers in your compost bin, it’s great for the soil.
Add your freshly brewed sweet tea to your glass container along with your SCOBY, plus 1 cup of original culture liquid.
Pop the lid on or cover with a tea towel and hold in place with an elastic band. Store in a cupboard away from direct sunlight and check on your kombucha after 5 days either testing the PH level or by taste testing.
To bottle the kombucha, add flavour and add fizz (this step is purely optional) take bottles with non metallic lids, add fruit, honey, seeds, natural flavourings and add your brewed kombucha. Place the lids on tightly and leave on the counter for a further 3-7 days. After this time place in the fridge to slow down any further fermentation.
Enjoy your sweet fizzy kombucha within 7 days after refrigeration.
To start again with a new batch of kombucha, repeat steps 1-9. Brew, bottle, repeat.


